
A Docker Stack for Personal and Team Projects in Python --- Part 3
Part 1 and Part 2 of this mini-series have gaven an overview of my Docker stack for Python projects and examined the image building process. This post will dive into using the image or, in other words, running the Docker image(s) during development and production.
In the spirit of making it simple, I’ve devised a single command named run-docker to do it all. The entire command is a short Bash script:
1
2
3
4
5
6
7
8
9
10
11
12
13
14
15
16
17
18
19
20
21
22
23
#!/bin/bash

set -e

# Although we check `--local` anywhere in the command,
# it's recommended to specify it before image name.
use_local=no
for arg in "$@"; do
    if [[ "${arg}" == --local ]]; then
        use_local=yes
        break
    fi
done

TINY=zppz/tiny:21.01.02
if [[ "${use_local}" == yes ]]; then
    MINI=$(bash -c "$(docker run --rm ${TINY} cat /usr/tools/find-local-image)" -- zppz/mini)
else
    MINI=$(bash -c "$(docker run --rm ${TINY} cat /usr/tools/find-image)" -- zppz/mini)
fi

cmd="$(docker run --rm ${MINI} cat /usr/tools/run-docker)"
bash -c "${cmd}" -- $@
This suggests the command is used like this:
1
$ run-docker [--local] ...
The flag --local is used when I’m not connected to the internet, or deliberately want to use what’s available on the local machine without checking whether newer versions of relevant images exist in a remote image registry. In the following descriptions I’ll not worry about this option. With this out of the way, the script is just a few lines:
1
2
3
4
5
6
7
#!/bin/bash

set -e
TINY=zppz/tiny:21.01.02
MINI=$(bash -c "$(docker run --rm ${TINY} cat /usr/tools/find-image)" -- zppz/mini)
cmd="$(docker run --rm ${MINI} cat /usr/tools/run-docker)"
bash -c "${cmd}" -- $@
We see our classic trick at it again: the code uses the super-stable image tiny to find the latest version of the image mini, from which it extracts the script run-docker and uses it. As a result, the command run-docker on a dev or prod machine rarely needs update, while its actual behavior may be evolving over time thanks to updates to the image mini.
Since the real code is the run-docker in mini, that’s what I’m going to examine next. A the end of the code is this line:
1
docker run ${opts} ${imagefullname} ${command} ${args}
The entire script is about determining all the options to the command docker run, and using them on this final line. Some of the options are passed in by the user. Some others are specified or derived in the code.
I’ll continue to use the template repo for examples.
Differences between dev and prod modes
As mentioned in Part 2, when we run build-docker in branch zepu, two images are built, namely,
zppz/docker-project-template-py and zppz/docker-project-template-py-zepu. (In real settings, you may want to use a shorter repo name to save some typing. Besides, the images pushed to registry are usually built in branch master, not any other feature branch.) These two images are used in development and production, respectively.
To facilitate development, the dev image does not contain the projct code—it contains dependencies only. As we develop code, we want to run tests to see whether it works; seeing issues or having new ideas, we make some code change, then run tests again. In this iterative process, we should not need to re-build the dev image. Any test run should use the latest code.
This “live coding” is achieved by “volumn mapping” the source code directory into the container using the -v option of docker run. When typing run-docker zppz/docker-project-template-py, we land in a container,
1
2
3
4
5
6
7
8
9
10
11
zepu@zepu-desktop in ~
$ run-docker zppz/docker-project-template-py

[docker-user in docker-project-template-py] ~/src [zepu]
$ pwd
/home/docker-user/src

[docker-user in docker-project-template-py] ~/src [zepu]
$ ls
README.md  archive/  build-docker*  docker/  pyproject.toml  setup.cfg  src/  tests/
$
We see the entire repo directory in the container as the directory ~/src.
It’s important to understand that this directory is not copied into the Docker image (which would have been immutable), but rather is the “live” code on the host machine “tunneled into” the container. If the code outside of the container is changed, we see the change inside the container right away. The option that enables this is essentially,
1
docker run ... -v ~/work/src/docker-project-template-py:/home/docker-user/src ...
Note that I intentionally typed the command run-docker zppz/docker-project-template-py in the user’s home directory instead of the repo’s directory. Then you may wonder, “how does run-docker know the image is connected to this particular repo and, further, this is a dev image so that it should set up volume mapping?”
This intelligence has to assume certain directory layout on the machine. The assumption run-docker uses is as simple as this:
Project repo directories are directly under $HOME/work/src/.
With this assumption, run-docker checks whether directory $HOME/work/src/docker-project-template-py exists. If yes, it’s a dev image. If no, it’s a prod image.
Within the container, we can navigate to the tests directory and run some tests:
1
2
3
4
5
6
7
8
9
10
11
12
13
14
15
16
17
18
19
[docker-user in docker-project-template-py] ~/src [zepu]
$ cd tests/

[docker-user in docker-project-template-py] ~/src/tests [zepu]
$ ls
test_dummy.py

[docker-user in docker-project-template-py] ~/src/tests [zepu]

$ py.test test_dummy.py
========================= test session starts ==========================
platform linux -- Python 3.8.6, pytest-6.2.3, py-1.10.0, pluggy-0.13.1
rootdir: /home/docker-user/src, configfile: pyproject.toml
plugins: anyio-2.2.0, pudb-0.7.0, cov-2.11.1, asyncio-0.15.1
collected 1 item

test_dummy.py .                                                  [100%]

========================== 1 passed in 0.14s ===========================
It is very convenient to have one terminal open in the dev container, running tests and investigative scripts as needed, while devloping code outside of the container, such as in a nice IDE.
Another question comes up: how does the test code find the package example? After all, the package is not installed in the dev image, and the source directory is not visible in the tests/ directory.
The answer is simple: run-docker adds the source code directory to PYTHONPATH once it determines the image is for development. Essentially it does
1
docker ... -e PYTHONPATH=/home/docker-user/src/src ...
In addition to the source code, run-docker volume-maps a data directory and a log directory into the container in both dev and prod modes. In a dev container, we see
1
2
3
[docker-user in docker-project-template-py] ~
$ ls
data/  log/  src/
In a prod container, we see
1
2
3
[docker-user in docker-project-template-py-zepu] ~
$ ls
data/  log/
The data/ and log/ are maps of corresponding directories in ~/work/ on the host machine.
In addition, they are represented in the container by environment variables DATADIR and LOGDIR, respectively. The project code can use these variables as it wishes.
A clear contrast between the dev and prod containers is that the latter does not have access to “live” code in src/. Instead, it has the project package (example here) installed and ready for use just like any third-party library.
How does this design facilitate team work
Notice that I typed run-docker zppz/docker-project-template-py without specifying the version of the image. Inside run-docker, it detects whether the image version is specified. If not, it will find the latest version by commands provided by the image tiny.
Imagine multiple developers are working on this repo. When Mary begins a new day and decides to test some new code, she types
1
$ run-docker zppz/docker-project-template-py
without knowing that Chris has successfully merged some code late yesterday. The company’s CI system built and tested the code, and pushed new versions of images zppz/docker-project-template-py and zppz/docker-project-template-py-master to a private Docker image registry.
Although Mary is not aware of this development, run-docker checks and sees the latest version of zppz/docker-project-template-py in the registry is newer than the latest version present on Mary’s machine. Without human instruction or intervention, run-docker specifies the newer version to use, and Docker automatically downloads it. In a few seconds, Mary lands in a container with the latest dependencies in place. Some startups would call this “advanced AI”. I’ll just call it neat automation.
Other features of run-docker
User can pass many arguments into run-docker to control its behavior. In addition, run-docker determines some settings on its own. Because the script in mini is free to evolve, the possibilities are plenty. Below are a few features currently implemented.
-
run-dockerdetects which argument it receives is the image name, then it considers those before it to be arguments fordocker run, and those after it to be the command along with arguments to be run within the container.For example, if the container is to provide a service, then user needs to specify “port mapping” like
-p 8080:8080.For another example, user can specify any environment variable needed by the program via
-e name=value.While
-pand-eare Docker arguments, project-command arguments are often useful when running a prod container, like1
$ run-docker zppz/docker-project-template-py-master:20210502-002343 python -m example ...
On the other hand, when the image name is the last argument, it means the default command of the image should be run. This is often the shell console or Python interpreter. The examples above for dev container make use of this.
-
While
run-dockerwill find and use the latest version of the image if a tag is not specified, it happily accepts an exact tag if specified. This is often useful during production deployment, especially rollback. -
Unless user specifies the
--rootoption,run-dockeralways runs as the unprivilegeddocker-useraccount. -
Some convenience is offered for running Jupyter notebooks. If I type
1
$ run-docker zppz/docker-project-template-py notebook
Some printout will suggest it is starting a Jupyter Notebook server. Once it’s ready, I’ll visit
http://localhost:8888and be greeted by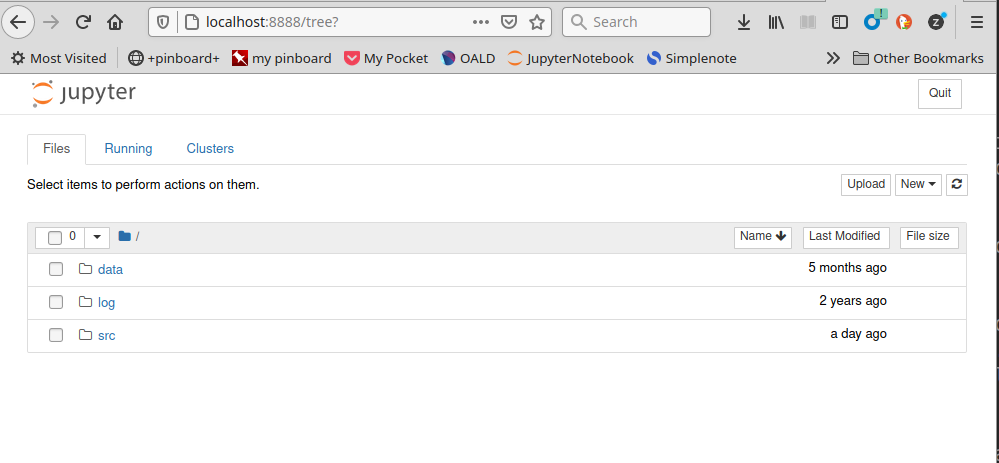
Now I’m all ready to type away some disorganized notebook code! It is totally executed within the container, with access to all the installed dependencies and the volume-mapped content in
src/anddata/.Behind the scene,
run-dockertakes care of port-mapping as well as some Jupyter settings to make this experience as pleasantly disorganized as possible! (Yes, data scientists like that.)
That’s all for this post. Please read the other parts:
- Part 1: overview.
- Part 2: building images.
- Part 3: running containers (this article).
- Part 4: building images for a separately installable Python package. (In contrast, the images built in “Part 2” do not provide a separately installable package. In order to use the Python package therein, one needs to use these images as base image.)